
Wednesday, November 25, 2009
Tuesday, November 24, 2009
Grand Buffet Breads-Style!
The Grand Buffet went off without a hitch today! And I am soo glad it is done! It opens up at 11am, which meant we needed to have everything set up by 10:30am, which also meant that we all needed to show up at . . . 5am.
In addition to making some great products for this big day every block, we have to present them in an effective and attractive manner. With the chocolates display, we borrowed some dummy cakes from the cakes class. For this display, we had to make our own decorative pieces out of "dead" dough (it has no yeast). We colored it with natural colorings (tumeric, cayenne, cocoa, etc), rolled it out, shaped it, and let it dry out overnight. It is super stable!
Our theme was "THANKSGIVING", so we did:
A Native American headdress:

A pilgrim's hat:

And some moccasins and shoes:

We put out three tables' worth of bread in baskets, on peels, and in bowls. Sliced. Whole. Small. Large! It was fun.

Conchas: a Mexican sweet roll with a crunchy cookie topping.

Mini baguettes!

Mini Ciabatta!

Another decorative piece:

Mini Multigrain!

Cherry Chocolate Sourdough... and a tiny hedgehog.

We also had our final today after class. It gets old having a final every three weeks! I'm constantly reviewing and studying! Tomorrow we are arriving in the bakeshop early again to prepare the breads in time for the graduation. Can't wait to be done with this class! I've enjoyed breads, but I'm ready for the next class!
Monday, November 23, 2009
What a Compliment!
I walked into the Chocolates class yesterday to ask Chef G if I could come in next week. He'd gotten ahold of some single origin chocolate from Hawai'i (woot!) and he offered it to me to play around with.
He was getting a nice box together, and I looked over and saw there on the tray... Molasses Chips! He'd told me when I was in his class that he really liked the recipe we came up with enough to put it in his next book. I thought it was so cool that he liked it enough as well to have people in his next class make it! How cool!
Later on this week, I'm definitely going to pick up a box of the See's version to do a little comparison :) as well as make some at home!
Bread Favorites
Every day at the end of our class, we sit down and have an evaluation of all the day's products. It's usually pretty fun and it's nice to see what everyone made, how it turned out, and taste it, too! We evaluate the shape, size, weight, length, color, crust, garnish, crumb on the interior, volume, smell, and taste. Then we'll usually make suggestions on how we can make the bread better for the next day.

 CHALLAH! HOLLA!!! I don't care much for the taste of this dough enriched with eggs and oil, but the braiding part is fun. This is an example of a 4-strand. For our practical next week, we have to do one 4-strand loaf and two 6-strand loaves. Braiding is easy for me, but once it's done, you pretty much have no control over how the bread will move when it's baked. Hopefully you've done it right (not stretched the strands too much, left them too loose, or floured them too much) and will end up with a great looking loaf!
 These corn rolls are another delicious bread that we make! The liquid we use instead of water is a mixture of milk and cornmeal. We also throw in some corn niblets too, so it's a super tasty roll!
 Focaccia - a lot of fun can be had with this dough. It's reeeeeaaaallly oily, easy to shape, and you can put any toppings you want on it! We do a basic rendition with onions, rosemary, olive oil and salt.
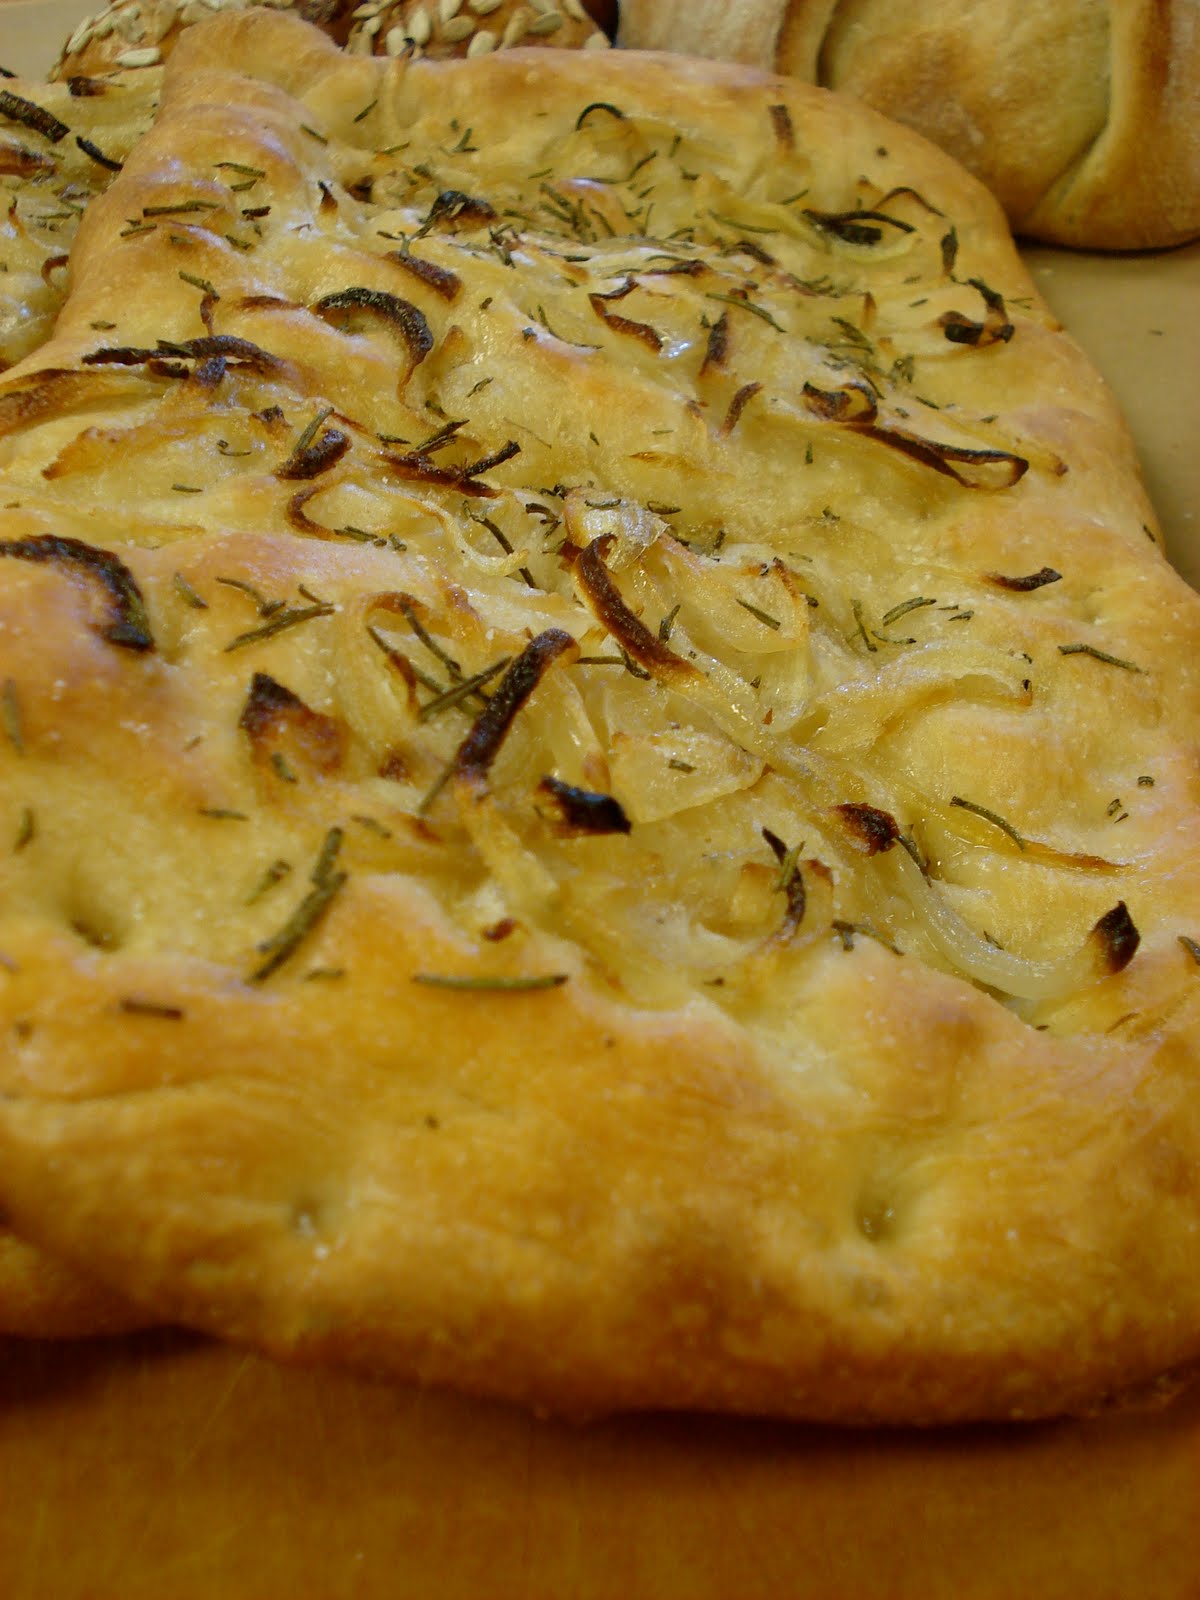 Sourdough - I love how much fun you can have with the scoring patterns on top. The score is like the mark of the baker. You can differentiate your product ("this is mine!") and make different designs for each bread. The scoring is necessary, because once the loaf goes in the oven, the first thing that happens is a little bit of expansion called "oven spring". The yeast dies and lets out one last bit of carbon dioxide and alcohol, pushing the bread up and out. The air needs somewhere to escape, and if the bread isn't scored, the air will escape at the weakest point (the seam, on the bottom).
 Ciabatta - This dough is so wet and sticky and tricky to work with. It requires a very gentle hand. Getting it out of the mixer is a chore enough! After it has fermented for a good hour or so, we dump it on a well-floured table and stretch it out in a big square. After it rests for about 15 minutes, we then cut it into smaller squares. Each piece is gently stretched out and placed on a couche ("koosh" - a linen cloth that helps looser breads keep their shape while proofing) to proof before going in the oven. No kneading happens, which is really weird. When it's cut open, there is a lovely open crumb (aka lots of holes in the bread) and a light texture. The crust is soft and this bread makes great sandwiches.
Today my partner and I made Semolina bread and I forgot to take a picture! And we also made a type of flat bread called Kalyra. It has a very minimal amount of yeast in it and is shaped like a cog and drizzled with salted honey! It was really tasty.
Tomorrow is le Grand Buffet (yet again) and we are in charge of making a GRAND presentation of bread. We're been working on a few pieces made with decoration dough. It has no yeast and gets dried in the oven. Our theme is.... "THANKSGIVING" (surprise surprise!) and I can't wait to show you what our class came up with for decorations. Should be good!
Tomorrow is le Grand Buffet (yet again) and we are in charge of making a GRAND presentation of bread. We're been working on a few pieces made with decoration dough. It has no yeast and gets dried in the oven. Our theme is.... "THANKSGIVING" (surprise surprise!) and I can't wait to show you what our class came up with for decorations. Should be good!
Turning in early tonight, I'm exhausted and there's a lot to do in the coming days! I can't wait to come home!
Friday, November 20, 2009
Pain au Chocolate
I'm really tired and totally eyeing my bed right now (so warm! so cozy!) but I just had to put this picture up because I am so stoked with how things came out today! We had a lot on our plate, so I was worried that we rushed through things instead of focusing on quality.
Check this out!

Each little pocket in that croissant once had butter in it! Croissants are made by laminating dough - folding a layer of butter inbetween dough, folding and rolling over and over again to create hundreds of layers. The butter melts in the oven, and the water in the butter evaporates into steam, pushing up each layer of the dough while it escapes - puff pastry! Before going into the oven, the dough was about an inch thick and flatflatflat. When it comes out the oven, it is a completely different animal. Amazing!!!
We stuck little chocolate sticks inside the dough and wrapped it up. It's a special kind of chocolate with a low amount of cocoa butter, so it doesn't melt too much in the oven. Tastes delicious!
Thursday, November 19, 2009
Leftover Confections
I finished this class almost two weeks ago... Here's some items I made during the last few days. Lots of fun!
Nougat Montelimar:
It's like an Italian meringue on steroids - whipped egg whites, cooked sugar and honey and gelatin, and lots of inclusions - all kinds of dried fruits and toasted nuts!

Lunas:
We made Port Marzipan. American marzipan is pretty much disgusting, so a lot of people think "ewww" when they hear the word. It's too sweet and bitter almond oil is often used. It's commercial. Homemade marzipan is AMAZING! These were so subtle in flavor; it would be very hard to guess the interior was marzipan! The marzipan was rolled out to a certain thickness, and then we cut out moon shapes using a petit four cutter, dipped and piped them!
 Agar agar orange jellies:
 Agar agar orange jellies:
These were really fun to make! Agar agar is derived from seaweed commonly found in Asia. It comes in many forms (dried, powdered, strips, etc) and is a great option for people who don't like gelatin, are vegan, or want something Kosher. However, agar agar melts at a higher temperature than gelatin, so when you put it in your mouth, it doesn't melt the same way. Plus the texture is kind of weird. It works as a stabilizing agent though!
For these delectable jellies, we made the outer, lighter-colored layer first by pouring it out flat. When it set (very quickly!), we cut it to size and then placed it into these half-pipe molds. It was bendy but stable! Then we made the filling and poured it in and let it set.


These were pulled out then brushed with some coloring, then we cut them in neat little slices on the guitar.
 Rolled in some sugar and citric acid... and done!

 Rolled in some sugar and citric acid... and done!
I asked Chef G if he knew how to make Molasses Chips - he'd never heard of them! What a travesty! These are a huge hit in my family. My grandparents used to give us kids our own boxes at Christmas... yum! A whole box of dark chocolate molasses chips just for me! :) They came from See's Candies and would quickly disappear within a day (or two) of receiving them. Ahh!!!
Chef G had heard of See's, but I never knew that they didn't exist on the East Coast! They are missing out! There's nothing to take the place of them either. I asked my friend from Jersey where people go to get chocolates for holidays, and he said just mom-and-pop type places. Interesting! Chef G was up for the challenge, and we created a recipe that we tested and manipulated to come up with a formula for something extremely similar to Molasses Chips! And it only took us two tries! How cool is that?!
The molasses...
 And dipped in the chip form!
My final test was to give one to someone from California without telling them what it was, and see if it reminded them of anything. The person said "These are like those toffee chips from See's!" Right on Aubs! Right on!


I'm hoping to do some re-creations at home!
Grand Buffet Chocolate Spread
Ahh... the Grand Buffet:


Strawberry Jelly Lips in a starch mold:
 Liquor cordials:
 Strawberry Jelly Lips:
 Orange pinwheels:
 Pistachio Princesse:
 Hazelnut marzipan:
 PB&Js:
 Walnut Marzipan:
 Turkish Delight: (which I would never trade my family for - it's just not that good!)
 Gummy bears:

 Liquor cordials:
 Strawberry Jelly Lips:
 Orange pinwheels:
 Pistachio Princesse:
 Hazelnut marzipan:
 PB&Js:
 Walnut Marzipan:
 Turkish Delight: (which I would never trade my family for - it's just not that good!)
 Gummy bears:
Wednesday, November 18, 2009
Things Are Happening!!!!
We're fresh into Week 2 of the last term (YES!!!) and already preparations for our graduation in March have begun!!
Today, we got fitted for our graduation jackets. Even though I think it's unnecessary, let's be honest - these are wayyyy better than regular ol' caps n' gowns! Plus they will have our names embroidered on them, our school's logo and the word "ALUMNUS". Awesome!
In three weeks, we have to go take graduation pictures (yes, they make us!). One group shot and an individual shot. I'm trying to come up with a good facial expression for my individual shot... Serious? Extremely excited/happy? Bored? Wise? Angry? Haha. I know, I know, one day I will look back on the pictures and be happy I have them, but right now I'm just not into it!
We sent two representatives from our group today to a graduation meeting. Word on the street is that our official graduation speaker is Emeril Lagasse!!! Weird? Yes. Cool? Yes. I feel like it's a little stereotypical, but it's cool nonetheless. I'll take it! Hopefully I'll get to meet him. I'm sure there will be about 5 "bam!"s and a few "kick it up a notch" catchphrases in his speech!
The breads class is speeding along and I got some cool pics to share, which I will post up this week, along with some leftover chocolates! I've got some time tonight to make it happen. Whew!
And tomorrow, I get to sleep in until 5am! Yay!!!

Thursday, November 12, 2009
Production and the Early Hours
Those two things are killing me! Well, I am keeping up alright in class. I am just exhausted at the end of the day!!! I struggle to fall asleep and stay asleep. I usually wake up two to three times a night, wondering if I have overslept my alarm! Ahh!
The last four days have passed by in a blur. My partner and I were on the enriched doughs station for two days, then yesterday and today we moved to a new station.
At this new station, we were in charge of three doughs, which is a lot for a group of two people (others have three). It is just go-go-go the whole day!
Right when we came in, we ripped through three doughs, getting the water scaled out and at the correct temperature, then dumping everything into the mixers. Then we had to simultaneously mix those and do all of our sticky dishes. The time just flies by, and even though we both worked very hard and very fast, Chef K still said we were behind schedule. I couldn't believe it!
The three doughs we made we very very tasty though: Sourdough, Challah, and Cheddar Onion Rye rolls yesterday and Caraway Rye rolls today! The rolls are easy, because the dough doesn't have to rest/bulk ferment for too long, and we have a lovely dough dividing press that cuts out 36 rolls at a time AND rolls them for us! It is amazing.
For the Challah, yesterday we learned how to braid it using six strands, and today we did it with four - so cool! Whoever figured that out is genius.
Working with the sourdough is definitely very interesting. We have to make a "sour" 18 hours ahead of time. This is basically a ratio of water and flour (to a sticky consistency) which we let sit and ferment. The natural yeast in the air gives it the sour acidic flavor as it ferments at room temperature overnight. We then add this to our dough when we mix it. After letting it ferment further for two hours after mixing, we shape the dough, then let it retard (slowly ferment) overnight in the refrigerator. This further develops the sour flavors. So cool!
Today in our lecture, we talked a little bit about the "desired dough temperature". This is basically the temperature we want the dough to be at when it comes off the mixer in order to have it ferment correctly. There are a lot of things to take into consideration: temperatures of the flour, water, ambient room temperature, pre-ferments, and even mixer friction. We learned how to calculate mixer friction (very cool) and will have to do this every day for the rest of the block. The mixer will add heat to the dough based on the dough hydration, mixing time, and even the number of RPMs of a certain type of mixer. The one thing that we do have control over is the temperature of the water, so that's always figured out last.
I had experience with this when working at a bread bakery. Every morning when I came in (at 4am!), I took the air temperature and the flour temperature and put it into a formula provided by the franchise. This way, I was able to find out what temperature of water I would need to make the dough. This helped to ensure a consistent product and always allowed us to let the dough proof for pretty much the same amount of time.
The last four days, my partner and I have been coming in at 6am. Tomorrow we switch to a new station, and we have to be there at 5am! I'm not looking forward to that at all, because it means I have to go to bed even earlier. Thankfully, the weekend is in sight and I can take some naps!
Wednesday, November 11, 2009

Monday, November 9, 2009
A Warm, Crusty Baguette!
It feels good to be baking again! I just started "P-Block" (weird) which is more commonly known as "Specialty Breads". YAY! I love breads. I love working with them, smelling them baking, and learning more about breads in general. You can be a little bit rough and a little bit gentle, and you have to be able to "know" things by using your eyes and hands to tell if the dough is just right! It's an ancient process and food, and it's so cool to be able to participate in the process. We're doing the same thing that alllll those people back in the day did!
I had to wake up at 4am this morning, and since it was the first day of class, I had the classic "I can't sleep" sleep. Waking up every hour, worried I'd miss my alarm, or forget something crucial, having bad dreams, etc. Not good! I knew it was going to be a long day.
My partner and I, in addition to our regular schedule, were also "stewards". So we had to arrive early enough at the storeroom to pick up the food order, deliver it, put it all away, bring the cart back, grab dishes and utensils for our breakfast bar, and later on take care of trash, sanitation, and assign cleaning duties at the end of the day. It was a lot of responsibility for Day 1 of the class, but we did a good job!
This is a production class, so there's no time to lollygag! Each station makes a few breads and every two days we'll rotate to get a feel for all of them. I was on the "enriched dough" station, meaning the bread is more than just the basic 4 ingredients (flour, water, yeast, and salt) - it's got fats, dairy, nuts, etc.
We got to make up some sunflower seed rolls, as well as brioche! It looked and smelled so delicious in the mixer, and we'll bake it off tomorrow! We also scaled out some ingredients for another bread we'll mix and bake tomorrow: Day of the Dead bread. Interesting!
At the end of the day, we will usually do product evaluation. Chef K will look over the breads, cut them open, and we'll all observe and taste, making comments on what's good and what needs improvement.
Today we got sent home with some fresh bread! I nabbed a half of a baguette and some butter.. yum what a tasty snack! I had just enough time to attempt a short nap between class and work.
I've still got some more pictures from my chocolates class to share, so I'll put those up sometime this week when I get a chance. I'll be tucking in early for this class... 8:30pm? 9pm? That's the only way I'm going to make it!!!
Thursday, November 5, 2009
Soft Caramels & Peppermint Patties
Yum yum yum!!! Both of these confections were sooo delicious!!! And so much fun to make! I am constantly amazed by how the ingredients we use come together in this class, based on the preparation techniques.
Soft Caramels:
These are characterized by their chewy caramel-flavor. The main difference between toffees and caramels is that the toffee is cooked to a higher temperature. These soft caramels contain sugar, glucose, evaporated milk, butter, and some flavorings (we used vanilla bean). The main flavoring comes from the Maillard browning of the milk and sugars - sweet! It required constant stirring until it reached a high enough temperature to evaporate some liquid and to reach the right consistency. I had to numb my fingers and then reach in and grab some of the caramel to check the texture... dangerous fun! Once it was chewy enough, we poured it into a frame and let it set.

We cut it by scoring the square first with a caramel cutter (think: six pizza wheels connected together) and then cutting them apart swiftly with a knife. The cuts have to be made with intent, otherwise the caramel will stick and you'll end up with smashed squares instead of nice, straight sides.

Then we dipped 'em in dark chocolate, did a little wavy pattern with the dipping fork, and let them set.

The flavor reminded me of Werthers, and I bet if I cooked it a little bit longer, I could have made a Werthers-like confection!
Mint Fondants/Peppermint Patties:
I was sooo excited to make these! Usually, people buy fondant because it is cheap, easy and convenient. Sometimes it is necessary to make your own so that you can have more control of the consistency. In my cakes class, we made rolled fondant ourselves, which was pretty easy. It is more like a dough. In this class, we made fondant to be used as centers for our confections. It was an easy process.
We cooked sugar, glucose and water to the soft-ball stage, then poured it out onto an oiled marble and let it cool a little bit. Then we vigorously agitated it with a scraper for a good 10 minutes.. and by vigorously, I mean it was like a workout! My abs hurt afterwards! It was scooped up and then spread out across the marble to encourage crystallization. It went from a clear liquid to an opaque white soft solid... so cool! We wrapped it up to be used the next day.
(Next day) My group got assigned the Mint Fondants (also known as Peppermint Patties). We were told to go down to the garden and check out the varieties of mint, then to pick the one we wanted to use in our confection. There was variegated pineapple mint (eh), lemon mint (bleh - tasted like Pinesol!), chocolate mint, and Kentucky Colonel, which we used. It tasted pretty normal!
I used a food processor to combine a bit of the fondant with the mint leaves, then combined it all and heated it over a water bath until it was fluid enough to pour using a funnel. Then, we deposited it into a mat with circle cut-outs. The fondant centers hardened in about 60 seconds! It was SO COOL! They were dipped in dark chocolate.

The other group across from us did the same recipe, but added another ingredient - invertase. It's an enzyme that breaks down invert sugar. This means that the group could make a product that was solid, encase it in chocolate, and then a few days later, the invertase would have broken the fondant down into a liquid - similar to Junior Mints! Isn't that cool??? That's also how liquor cordials and cherry cordials are made. AMAZING!!!
Wednesday, November 4, 2009

Tuesday, November 3, 2009
Sweet Goodness!!!
Class is so much fun!!! Today I got to recreate a favorite of mine that reminds me of my grandparents. But before I get to that in another post, here's some more from last week!
Non-crystalline: Hard Candies
I had no idea these were so easy to make! I am getting more comfortable working with sugar, but for some reason these were suuuper suuuper hot to work with! We cooked sugar, glucose syrup and water to the hard-ball stage and spread it out onto the marble to cool in a large puddle and a small puddle. Color, flavor, and citric acid was added to both. When it was cool enough to handle (but still ripping hot), my partner and I pulled the sugar to incorporate air and mix in the color and flavor. We chose to do passionfruit and wanted a pink and purple color. However, we learned that purple in hot sugar turns to blue. Weird!
Once we had our two colors pulled, we twisted them into long ropes and then cut off pieces with scissors. It hardened really fast, so we had to work fast and then keep warming the sugar up with a heat lamp and the microwave. Check it out!

This shape is the "artisan's" shape. Now there are machines that can make this shape so they look homemade. Personally I enjoy it! I sent some of these off in a package to my brother in Iraq, and hopefully they'll hold up well!

Hollow-shell Truffles: Dulce de Leche Coffee
We used hollow shells that are machine-made. The advantage to these is that they all look uniform in size and shape, and no skill is needed when filling them. You can also make a softer filling for some good textural contrast.

First, we filled the shells with a little bit of dulce de leche. We stuck some cans of sweet condensed milk in water and simmered them for four hours.
Next, we made up a soft butter ganache with milk chocolate and milk that had been steeped with freshly ground coffee beans. We piped that in and let it set, then coated our truffles in milk chocolate and sprinkled some instant coffee crystals on top! Yum!!!

Next up: Soft Caramels and Peppermint Patties!!! :)
Monday, November 2, 2009
November Is Here!
The crisp is finally in the air... and it's getting chilly!!! Usually I hustle off to class without a jacket because my clothes are pretty thick, and it's a three minute walk to the main building. That all may be changing... classes start early and the mornings are cold! Brr! Thanks to the time change, this morning it was actually light outside when I left for class - a rarity! I'll try to enjoy it while I can.
It's the last week of chocolates class, and I'm sad about that! It has truly been a pleasure to be in this class. It is so relaxing because there are no production needs and the focus is on the process more than on the final product. I am learning so much!
Now, where did I leave off? We've made so many delicious confections in the last few days!
Ahh... Mt. Rainiers! Named after that mountain in Washington... these were so fun to make! They are under the "butter ganache" category of chocolates. The technique for putting the ganache together is similar to that of cream ganache, but it's a water-in-fat emulsion and temperatures are always important. This one took little more legwork to get it to come together just right, but the finished product was rad!
We started off by piping some discs with tempered chocolate, then placing a half of a brandied cherry on each one...

Once the ganache as made, we piped it on top to seal in the cherry. The ganache was a white chocolate butter ganache flavored with Kirschwasser. Some of our Mt. Rainiers looked more like Mt. Crumpet, the Matterhorn, or the Crag (from GUTS, one of our fav. kid action shows!).

And some looked really really nice!

The finished mountains were dipped in dark chocolate, then a little bit of white chocolate was piped on top, a little snow decor!
 Eh they didn't cut so nicely, but they tasted great!
Subscribe to:
Posts (Atom)